
Hello beauty buddies,
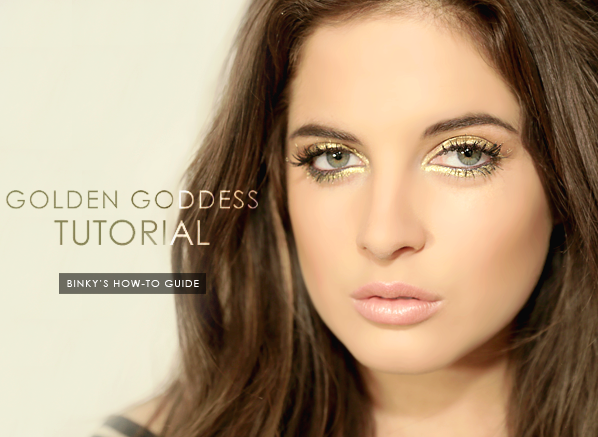
It’s been a bit of a mad week for me – it was my 23rd birthday last week and I celebrated in style! While experimenting with different beauty looks before the big night, I found one I particularly love, taking inspiration from the metallic beauty looks that were all over the SS13 catwalks: Gold nails, gold on the eyes – even gold lips! I’ve taken my favourite elements of these looks to create the ultimate Grecian-style golden goddess look, featuring warm, shimmery skin and a dazzling gold eye. It’s great for a night out, and looks amazing against a bronzed bod.
It’s also surprisingly easy to achieve – here’s how I did it.
Golden Goddess: How To Do Golden Makeup
Step 1 – Shimmery Skin
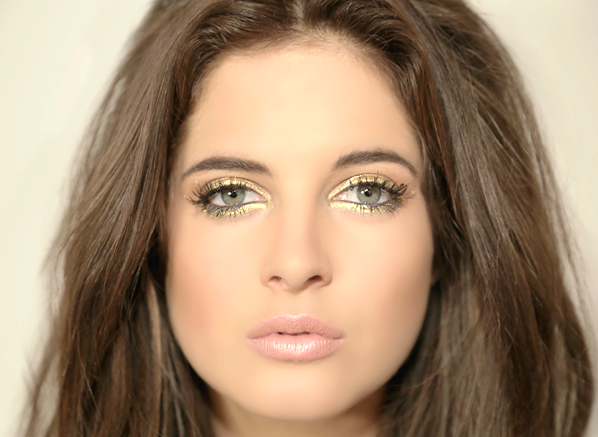
To achieve the shimmery skin I wanted I used the Clarins Instant Light Complexion Perfector, which can be worn alone or under foundation. This product is loaded with shimmery pigments that really illuminate the skin and bring it to life, as well as adding some sheer coverage. I gently dabbed it to the skin and blended it in with my fingers; you don’t need too much of it, just a few squeezes of the pump are enough to provide a beautifully glowing base.
Step 2 – Glittering Eyes
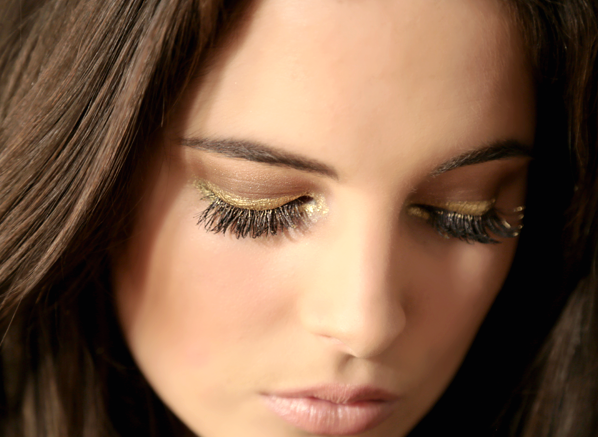
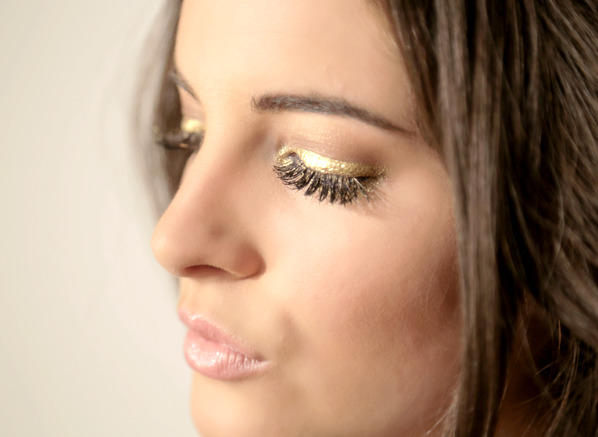
The main attraction in this look is of course the glittering gold eye. To create this I used the bareMinerals High Shine Eye Colour in Bronzed, packing the colour all the way over my eyelid as well as on my lower lash line. The eyeshadow is super-pigmented and creamy, it glides on like a dream!
Step 3 – Golden Brown
I then added some warmth to my glittering gold eyes by applying Guerlain’s Terracotta 4 Seasons Bronzing Powder to my socket lids. I did this with an angled brush, concentrating on the outer corners for a winged effect. The gorgeous bronze colour works really well against the gold. Don’t be scared to experiment with beauty products, make-up is all about having fun after all!
Step 4 – Eye-Popping
Next, to add some depth to my eyes, I applied the Daniel Sandler Waterproof Eyeliner on my upper and lower waterlines. This really makes the eyes pop. I then covered my lashes with Daniel Sandler Jumbo Jet Mascara, which both lengthens and volumises the lashes without making them clump together.
Step 5 – Bronzed and Sculpted
You all know how much I love my bronzer, and this look is all about looking golden and gorgeous, so I decided to use another bronzing product – the Clarins Bronzing Duo – to sculpt my face. First, I swept the lighter shade in the palette under my cheekbones, across my temples and down the sides of my nose. This light shade contours the face and makes it look slimmer. I then moved on to the darker shade, which I applied across my cheekbones to really warm up my skintone.
Step 6 – Finishing Touches
Finally, I applied the Daniel Sandler Lipshine in Buff. This is a sheer lipstick with just the right amount of pigmentation – it’s a peachy nude colour with shimmery golden undertones that complemented the gold on my eyes perfectly.
You don’t have to stop at the face – you can accentuate your shoulders and décolletage with some shimmery body bronzer for that all-over golden goddess look. Apply Too Faced’s Royal Oil Coconut Body Bronzer to your arms and chest, and finish off with a dusting of powder bronzer on your collarbones.
So there you have it, a golden goddess look guaranteed to get you a Hercules!


yorkshirelady
Daniel Sandler Long Lasting Waterproof Eyeliner 0.35g

I have worn make up since 15 years old and never go a day without it! I did use Almay but they discontinued it so have spent pounds on different eye pencils lately and finally found one that doesnt melt away! I define my lower lid and then use mascara and this pencil stays on all day. It is so good that i have now started to use on upper lid without looking like a clown! Cant believe when i look in mirror by lunchtime and still have clear defined eyes....great, will def explore other products by Daniel Sandler.
