
I’ve often wondered, as much as you have, if the foundation/concealer technique I’ve been religiously using for years is giving me the best results? It’s a question that even has makeup artists and some beauty editors at loggerheads.
A perfect base isn’t just about the products; it’s all in the application. Over the past decade, polishing up the way I do my makeup was my most significant beauty learn – I’ve got the empties to prove it.
I get it; everyone’s coverage preferences and makeup styles are different. But, after years of research, there’s only one way for me and it’s foundation first. So here I am, armed with hours of research and experience sharing the best order to apply your base products – the makeup artist approved way…
Step 1 – Apply Your Base

After you’ve finished your skincare, and applied your primer (I love Filorga’s Pore-Express Regulating Primer), the majority of makeup artists recommend using a light layer of your chosen base product first. Foundations are base products, not camouflagers; they help to even out your skin tone and reduce the appearance of any blemishes, discolouration and redness. Plus, if you’re using the right foundation formula for your skin’s needs, it should be doing most of the concealing for you.
I like a medium-coverage foundation that adds a little bit of luminosity to my skin, so the Clarins Everlasting Youth Fluid Foundation in Vanilla is perfect for me. You may prefer to use a tinted moisturiser or BB cream, or if you’re happy with your skin entirely you could even skip this stage!
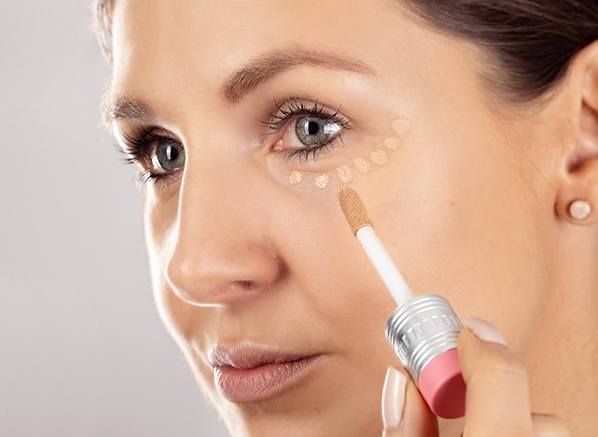
Step 2 – Conceal Under Your Eyes

Most of us, even on those au-naturel days, need a little help here. An excellent under-eye concealer instantly lifts your face and gives the illusion of being bright and awake – even if you’ve been burning the candle at both ends.
My tip? Choose a product that’s specifically for the under-eye area. These will not be too heavy for this delicate area of your face, and will often contain light-diffusing pigments that will help to diminish those pesky dark circles. Benefit’s Boi-ing Cakeless Concealer in Medium Natural feels lightweight and won’t settle into fine lines or crack throughout the day.
Step 3 – Spot Conceal For Extra Coverage

If an annoying spot is still peeping through, now’s the time to cover it (using the micro-concealing technique I discovered here). Instead of something lightweight, you’ll need a fuller coverage concealer for this imperfection. You’ll also need a shade that perfectly matches your skin tone for this step to ensure any blemishes are entirely unrecognisable, anything lighter or darker will make your spot more obvious.
I use Lancome’s Ultra Wear Camouflage Concealer in 220 Buff and love how it makes light work of covering blemishes and also the redness that sometimes appears around my nose.
Step 4 – Set Your Base

Even if you’re wearing the lightest coverage base, you shouldn’t skip this step. It will prevent your foundation vanishing by lunchtime. Sometimes powders get a bad rep; they can often be associated with pink fluffy puffs and an icing sugar finish, but most modern formulas aren’t at all cakey and look undetectable on the skin. I love the YSL Universal Setting Powder because it doesn’t mask my glow but keeps my everything looking seamless throughout the day, it doesn’t cling to dry patches either, which is vital for me in a powder.


